
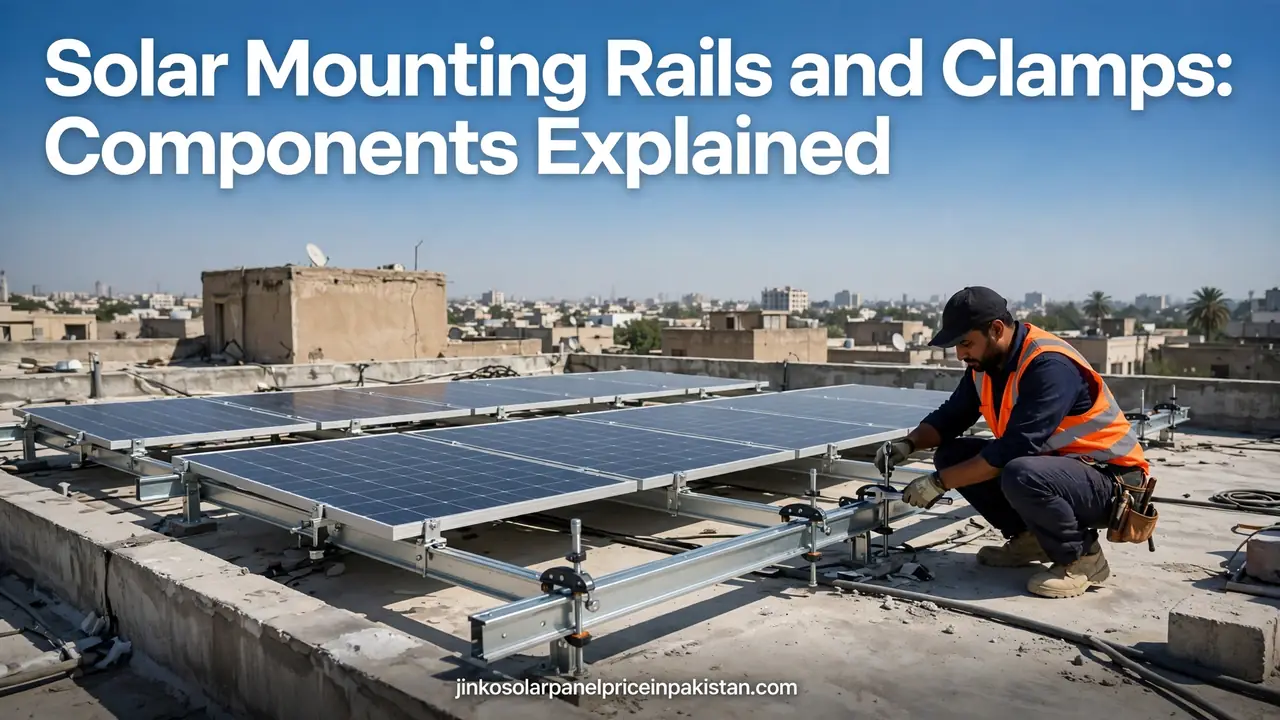
Solar Mounting Rails and Clamps: Components Explained

What is solar mounting rail hardware? It is the long metal bar that sits between your roof fixings and your solar panels, carrying the weight of the panels and holding them in place. Two parallel rails run underneath each row of panels, the panels are clamped to the rails, and the rails are bolted to the roof through L-feet or standoffs. In short: the rail is the backbone of the whole mounting system — everything else (clamps, splices, grounding lugs) hangs off it, and if the rail is wrong, the whole array is wrong.
Most homeowners in Pakistan never see their rails. They sit hidden under the panels, and installers rarely discuss them. But rails decide whether your panels stay put through a monsoon storm, whether water leaks into your roof, and whether the panels can be removed safely for maintenance years later. This guide explains what a mounting rail is, what clamps do, how the parts fit together, and what to check before your installer starts work. For the wider picture — structure types, tilt and elevated frames — see our solar panel mounting structures guide.
What Does a Mounting Rail Do?
A mounting rail has three jobs. First, it spreads the load: the weight of the panels, plus wind pushing on them, is collected along the rail and passed into the roof at a few fixing points. Second, it gives the clamps something to grip — panels are clamped to the rails from above, not bolted through their frames. Third, it sets the geometry: rail spacing and direction decide the panel tilt and the gaps between rows.
Rails are normally fitted in pairs under each row of panels. A single panel rests on two rails, one near each end, with clamps holding the panel frame to the rail at four points. Longer rows use more rails joined end to end with splices. On a flat concrete roof in Pakistan, the rails are usually raised on legs or a raised frame so the panels sit at the right tilt angle for your city.
Aluminium vs Galvanised Steel Rails
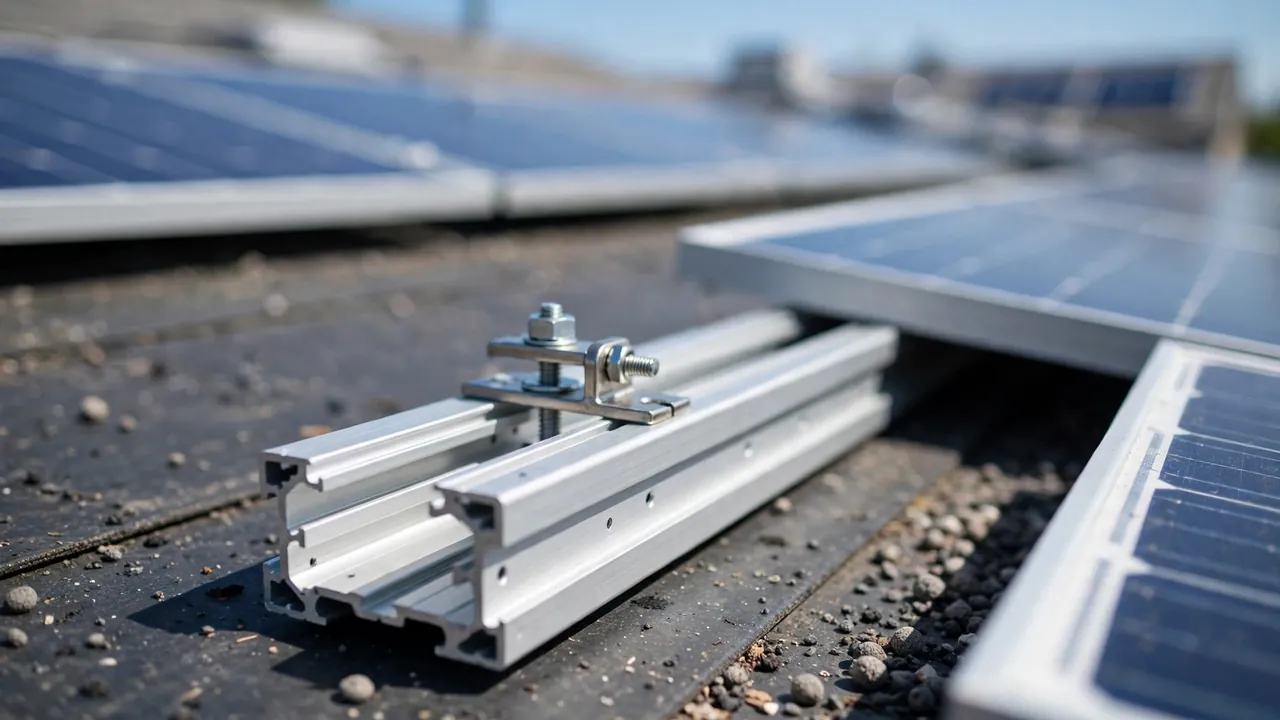
In Pakistan you will meet two rail materials. Aluminium rails are the standard for branded rail systems. They are light, they do not rust, and they are extruded into a profile with a channel on top that the clamp bolts slide into. Aluminium rails are usually anodised in a mill (silver) or black finish, cost more than steel, and need almost no maintenance.
Hot-dip galvanised (GI) steel rails are the common choice for locally fabricated structures in Pakistan. A steel channel or angle section is dipped in molten zinc, which protects it from rust. The weakness is the coating: if the zinc layer is thin, scratched during installation, or cut and welded on site without re-coating, rust starts at the bare spot and spreads. Ask your installer whether cut ends and welds were treated after fabrication — this one question separates a structure that lasts from one that rusts from the inside out.
Either material works when it is sized and installed correctly. The problem is never the material alone; it is a rail that is too light for the span or left unprotected where it was cut.
Rail Sizes and Spans: Light, Standard and Heavy
Branded rail systems come in graded sizes — a light rail for calm conditions and short spans, a standard residential rail, and a heavy rail for long spans and high wind loads.
As an example of how the grades differ, IronRidge’s XR range — described in the altE guide to XR rails and roof mounts — rates its light XR10 rail for spans up to about 6 feet, its standard XR100 residential rail for spans up to about 8 feet, and its heavy XR1000 rail for spans up to about 12 feet. The numbers are manufacturer ratings for those specific products, but they show the principle: a heavier rail buys you a longer span and fewer roof penetrations.
For a Pakistani rooftop, the practical question is simpler: how far apart are the roof fixings, and is the rail stiff enough for that gap? If fixings are close together, even a light rail is fine. If your installer wants to stretch the span to save on fixings, the rail must be heavier — and if neither is true, the panels will flex in the wind, working the clamps loose over time. Our solar structure wind load design guide explains what storm forces your structure has to handle.
Mid Clamps and End Clamps: How Panels Are Held
Clamps are the small metal pieces that grip the panel frame and bolt it to the rail. There are two types, and every row of panels uses both.
Mid clamps sit between two neighbouring panels in the same row. One clamp grips the frames of the panel on either side, so a row of panels is held by a chain of mid clamps. The number of mid clamps in a row is one fewer than the number of panels — a row of four panels has three mid clamps.
End clamps sit at the ends of a row, gripping the outer edge of the first and last panel. A row needs four end clamps — one at each end of each of the two rails. End clamps are sized to the thickness of the panel frame: most modern panels have frames 30 to 40 mm thick, and a clamp made for a 35 mm frame will not grip a 30 mm frame properly.
Good clamps are made from aluminium or stainless steel, so they do not rust, and they are tightened to the manufacturer’s torque setting — tight enough to hold, not so tight that the frame is crushed.

Splices, End Caps and Rail Joints
Rails come in fixed lengths, so a long row needs more than one rail joined end to end. The join is made with a splice — a short internal bar that slides inside both rail ends and is bolted tight, making a continuous rail. A poor splice — loose bolts, a splice bar that is too short, or rails butted together without one — creates a weak point that flexes and a gap where water collects.
End caps are small plastic or metal covers pushed into the open ends of the rails. They look cosmetic, but they stop rain, dust and insects from collecting inside the hollow rail, where trapped water speeds up corrosion.
L-Feet, Standoffs and Roof Attachments
The rail itself never touches the roof. It is held up by fixings — most commonly L-feet, small angled brackets that bolt to the roof on one side and to the rail on the other. On a flat concrete roof, the L-foot usually sits on a short leg or a raised frame so the rail is high enough to set the panel tilt.
Two things decide whether these fixings last: the bolt must bite into solid structure, not just into plaster or a thin screed, and the hole must be sealed. Every roof penetration is a potential leak, so each fixing needs flashing or a waterproof seal around it. If you are hiring an installer, our guide to choosing a solar installer in Pakistan covers the questions to ask before work starts, and our common solar installation mistakes guide lists the shortcuts to watch for.
Grounding and Bonding Through Rails and Clamps
Metal rails and clamps are part of your system’s safety earthing. When a fault occurs, or lightning strikes nearby, the metalwork has to give the current a safe path to earth instead of through a person touching the array. In most modern rail systems the clamps themselves bond the panel frames to the rails, and a grounding lug on each rail row connects the rails to the earth wire — so the rail doubles as part of the earthing path.
That only works if the connections are actually made. A painted rail, a clamp with an insulating washer in the wrong place, or a splice that breaks the metal-to-metal contact can all interrupt the bonding. This is why installers use special bonding hardware — star washers and bonding clips that bite through surface coatings — rather than ordinary bolts. Our solar panel earthing and grounding guide explains the full earthing path.
Rail Layout: How Many Rails and How Far Apart?
The basic layout is simple: two rails under each row of panels, running in the direction of the panel rows. The rails sit under the panel at the points the panel manufacturer allows — normally within a zone near each end of the panel, not at the very edge and not in the middle.
Three layout mistakes are common in Pakistan. The first is rails spaced too far apart, so the panel overhangs the rails by too much and sags at the edges. The second is rails that are not parallel, so some clamps grip tightly and others barely touch the frame. The third is mixing rail sizes in one array — a light rail in one row and a heavy rail in the next — which means the rows behave differently in a storm. Leave enough gap between rows for cleaning and for air to flow under the panels, which keeps them cooler. Our solar panel row spacing guide covers the layout in detail, and the elevated solar structure design guide covers height, span and load for raised frames.
What to Check Before Your Installer Starts
Check them before installation day, not after. Ask for these five things: the rail section and material (aluminium or GI steel, and which profile — a vague answer means the structure is being improvised); clamp size matched to your panel’s frame thickness; fixing spacing, and whether the rail is rated for that span; grounding hardware — bonding washers or clips, a grounding lug on each rail row, and an earth wire to the earth rod; and cut ends and welds treated on GI steel, or rust starts there first.
Also ask whether the rail system is a branded kit or a local fabrication. Neither is automatically better — a good local fabrication with proper galvanising can outlast a cheap imported kit — but you should know which one you are paying for, and the warranty should match. On weak or old roofs the fixing question is even more important: a rail system is only as strong as the roof it is bolted to — see our guide to installing solar panels on a weak roof.
Maintaining Rails and Clamps Over Time
Rails and clamps need little maintenance, but they should not be ignored completely. Once a year — ideally before the monsoon — check the accessible parts of the array: look for rust streaks on GI steel, especially at cut ends and welds; check that end caps are still in place; look for clamps that have shifted or bolts that have backed out; and check that the earth wire is still firmly attached.
Do not climb onto the array yourself to check it. Walk around it at ground level with binoculars, or ask your installer to include a rail and clamp check in their annual visit. Put the check on the same schedule as the rest of the system — our solar system maintenance checklist covers the monthly and yearly tasks. And never let anyone drill into a rail or clamp to run a cable: rails have a channel for cable clips, and the DC cables should be clipped into that channel or tied neatly along the rail — see our solar DC wiring guide for how the cabling should run.
Frequently Asked Questions (FAQs)
What is a solar mounting rail?
A solar mounting rail is the long metal bar that runs underneath a row of solar panels, carrying their weight and holding them in place. Panels are clamped to two parallel rails, and the rails are bolted to the roof through L-feet or standoffs.
What is the difference between a mid clamp and an end clamp?
A mid clamp sits between two neighbouring panels and grips both frames at once, while an end clamp sits at the end of a row and grips the outer edge of the first or last panel. A row of panels uses mid clamps between panels and four end clamps at the ends of the two rails.
Are aluminium or steel rails better for solar panels in Pakistan?
Aluminium rails do not rust and need almost no maintenance, which suits branded racking kits. Hot-dip galvanised steel is strong, widely available and common in local fabrications, but cut ends and welds must be re-coated or rust starts there. Either works when sized and installed correctly.
How many rails does a solar panel need?
A single panel rests on two rails, one near each end, held by clamps at four points. Longer rows use more rails joined end to end with splices. The rails must sit within the clamping zone the panel manufacturer allows, not at the very edge or the middle of the panel.
What is a rail splice in solar mounting?
A splice is a short internal bar that slides inside two rail ends and bolts tight, joining them into one continuous rail. It keeps the rail straight and the electrical bonding continuous along the row, so the grounding path is not broken at the joint.
Do solar mounting rails need grounding?
Yes. The rails and clamps form part of the system’s safety earthing: clamps bond the panel frames to the rails, and a grounding lug on each rail row connects the rails to the earth wire, giving fault current a safe path to earth.
What should I check about rails and clamps before installation?
Check the rail material and section, that the clamp size matches your panel frame thickness, that the fixing spacing suits the rail span, that bonding hardware and a grounding lug are included, and that cut ends and welds on galvanised steel have been re-coated.